Post Surgery Expectations and Rehab:
The first few days, your pet may hold up their leg. They may need some mild support moving around. Then they will start to toe touch and use their leg to balance. Over time they will use the leg more and more. We have you ice the outside surface of the leg for 5 to 10 minutes several times a day for 3 to 5 days. After 3 to 5 days, we have you switch to using heat on the outside surface of the leg. We also have you perform passive range of motion exercises on your pet to keep their leg from getting stiff. During the first 2 weeks, we have you leash walk your dog only for bathroom breaks and try to rest them the remainder of the time.
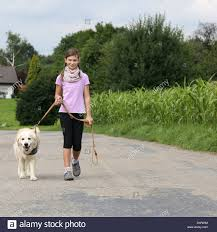
At 2 weeks we expect 10 to 25 % normal weight on the surgical leg and moving around comfortably. At this point the incision should be healed and that is when we no longer need to stop them from licking at the incision. We start to do controlled walks for 5 to 10 minutes at a time, one to 4 times per day. Every week after that you can add an additional 5 minutes to the walks. The goal is to use a short leash to prevent sharp movements and to move at the pace that your pet uses the surgical leg the most.
At 8 weeks we expect 50 to 75% normal weight on the surgical leg. At that point we radiograph the leg again and if the surgical site is healed, we have you do 1 week with some light higher impact exercise (jogging for 3 to 5 minutes per day). This is to help strengthen all of their muscles, ligaments, and tendons that they haven’t used much in the last 8+ weeks. After that week of light higher impact exercise, you can let your pet off leash and unrestricted.
In general we recommend only allowing your pet to go outside when on a leash for 8 weeks post surgery. We also recommend no running or jumping, including beds or couches, for 8 weeks.
For more detailed information and specific instructions for post-op please see below.
This page has been designed to help you rehabilitate your pet.
Please call the office if you are concerned at all during the recovery process, and we can get you in for an appointment with a doctor.
Each patient’s recovery is different, and the process can be challenging at times. However, we know that you are doing everything you can to help your pet.
The plan laid out in this page is to help :
- Speed in the recovery of the surgical leg
- Prevention of muscle atrophy
- Return the normal range of motion
- Decrease pain
Although the goal of rehabilitation is to help, we must understand that ultimately there may be some discomfort during the rehabilitation process. A muzzle may be needed to help complete the rehab. If your pet seems to have severe discomfort during the therapy, we would ask that you stop and schedule an appointment for an evaluation.
Strict confinement is extremely important in the healing process. This can be done with a simple X pen or a small bathroom or kitchen area that has rugs covering any slick surface floor areas.
Recommended Treatments and Instructions
Medications:
We recommend a non-steroidal anti-inflammatory medication from the time of the injury until after the rehab is completed. This is typically a medication called carprofen given once a day. If the injury has been there for a while we also recommend Librela, a once a month injection that helps reduce chronic pain.
Weight:
We recommend decreasing the diet by 25% after surgery for the 3-month recovery time to help prevent weight gain.
Exercise:
Daily exercise is essential after the rehabilitation period. Mild to moderate exercise helps to strengthen the hip muscles, maintains flexibility, and promotes joint fluid production by the joint capsules.
Preparing your Home – Post Surgery
Here are a few tips on how to ensure a safe home environment:
Preparing the House
It is important to have a plan on how and where you are going to restrict or confine your pet during this crucial post-operative period. Quality rest is as important as having a good therapy plan. Many owners incorporate one of the following:
- Dog crate
- Gated off area, such as a kitchen
- Room confinement
No Jumping at All
It is EXTREMELY important not to allow your dog to jump, AT ALL!!! Over extension of the stifle (knee) could compromise the repair and slow healing time.
- NO JUMPING on/off bed
- NO JUMPING on/off couch
- NO JUMPING up on you
Stairs
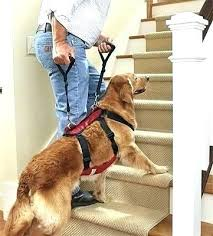
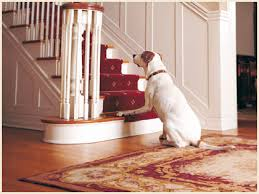
Stairs, like jumping, will over stress the joint and inhibit repair if your dog goes up and down too fast or aggressively. In the beginning stages, right after surgery and until your veterinarian says it is okay, it is imperative that you do what you can to prevent going up and down stairs quickly.
Take the following precautions:
- Use a towel or ginger lead to support the body
- Block off all stairs to prevent access
No Horsing Around
As much as you would like to play with your dog or have him/her play with other dog friends, this is not a good idea until your veterinarian gives you the green light to do so.
Walking Surfaces
Wood floors, tile, linoleum, etc., can all be very slippery to your recovering pet. Consider putting down some throw rugs with rubber backing to make it easier for your dog.
My dog’s leg was just fixed, so why is he still limping?
Initially your dog is going to limp on the surgically repaired leg during the healing process, but you should see the limping decrease in the following weeks.
It is very important to note that if your pet slightly over does an activity one day during recovery, they may begin to limp a bit more than they have been. If this happens, please apply ice, allow a good 24 hours of rest, give any prescribed pain medication, and call.
Recheck: Post Op
10–18 days post surgery:
This recheck appointment is to evaluate the skin and make sure it has healed properly. We also evalute the knee for pain, range of motion, and stability. If things look good then you no longer need the e-collar, you can give a bath, and you can start doing some controlled walks.
8 weeks post surgery:
At this appointment we will sedate your pet and obtain radiographs to evaluate the healing process. Most patients are sufficiently healed at this point to return to some higher impact activities and can return to off leash activities.
Please call at any time with any issues, and we will be happy to get you in for a recheck with the doctor. The leg will continue to strengthen for as long as 6 months.
Post Surgery
Normals
- Swelling around the incision for the first 2-3 days following surgery
- Swelling below the incision for up to 10 days
- Bruising around the incision or on the leg
- A small amount of discharge from the incision that is clear or even a little blood tinged for 24 – 48 hours
- Discomfort on the repaired leg around the incision
- Warm to the touch around the incision
Abnormals
- Swelling that lasts longer than 4 days at the incision
- Bruising in areas other than the incision site, but it can migrate down the leg
- Discharge that is not clear after 24 hours
- Large amounts of bleeding or discharge that does not stop
- Discomfort that is not alleviated with ice application and the pain medication prescribed by our veterinarian
- Discomfort that causes your pet to cry out or bite
Week 1–2
**A recheck will need to be scheduled in 10-14 days**
**No running, jumping or access to stairs**
Ice Therapy – Starting the day of surgery for 3–5 days
15 minutes 4 times daily for the first 3–5 days
Gel ice packs or frozen bagged vegetables can be used. Wrap a thin towel around them before applying.
Short and Controlled Leash Walks
- 5 minutes out to potty and back in
Do not take any chances with the leash walks. It only takes a split second to dart off and re-injure the leg or simply overdo any activity.
PROM – Passive Range Of Motion and Gentle Extension
- 8–10 repetitions 4 times daily – This should be started 3 days AFTER surgery, but can be started sooner if your pet allows this.
The purpose of the PROM is to stimulate the normal motion of the surgical joint. This should be done after massage and with your pet resting on their side. Start at the hip and gently extend and flex the leg. Then move to the knee and then the ankle. Always use your free hand to support the leg while doing the PROM. Never force any PROM or extension if your pet is extremely uncomfortable. It is normal for there to be some resistance, but this is very important to prevent fibrosis (stiffening) of the joint.
Dry Heat Therapy – This can be started 3–5 days AFTER surgery, once heat therapy is started stop icing the knee
Do not do it if there is any swelling around the surgical joint.
- 5-10 minutes prior to exercise
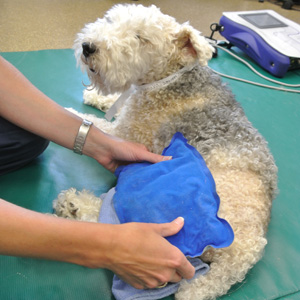
- Apply a thin towel between the leg and the warmer
Week 3–4
Short and Controlled Leash Walks
- Up to 15 minutes out to potty and back in
Do not take any chances with the leash walks. It only takes a split second to dart off and re-injure the leg or simply overdo any activity.
Stretching and PROM – Passive Range Of Motion and flexion and extension of the knee
- 10–15 repetitions 3–4 times a day
- 10 minutes each session for a total of 3–4 times daily
- If your pet is comfortable with this
- 10 repetitions 3–4 times daily
Walk your dog along an imaginary drawing of a figure 8 on the ground. If there is any imbalance, make the figure 8 bigger. The goal of this is to help to increase muscle strength and balance.
Week 5–8
Short and Controlled Leash Walks
- Up to 30 minutes out to potty and back in
Do not take any chances with the leash walks. It only takes a split second to dart off and re-injure the leg or simply overdo any activity.
- 10 repetitions 2 minutes twice daily
Walk your dog along an imaginary drawing of a figure 8 on the ground. If there is any imbalance, make the figure 8 bigger. The goal of this is to help to increase muscle strength and balance.
- 10 minutes each session for a total of 2–3 times daily
PROM – Passive Range of Motion and gentle extension of the knee
- 3–4 times daily
Sit to Stand (Sit-ups) – twice daily
- 5–7 repetitions 1–2 times daily
We call these puppy sit-ups. We want them to go from a standing position to sitting and then standing up again. This exercise helps the joints in the rear legs with extension and flexion, which then helps work the muscles around the knee. This is best done around meal time. If you need to use treats, make sure they are low fat and only give small pieces.
Week 8
Radiographs – We will schedule a set of radiographs and determine if your pet can begin to be off leash for bathroom breaks, light running and getting on and off couches or beds
8–12 Weeks
Test may walk normally at this point, but may still have a subtle limp
Muscles should start to grow and start to look more like the non-affected limb
6 Months
Walking and running should be normal
Hind limbs should look symmetrical
1-2 Years
Arthritis may progress, and any regression should be noted. Pain medications and joint supplements may be prescribed
The goal of the surgery is to reduce and slow down arthritis progression, but it will not stop is completely
Therapy Directions
Ice Therapy
This is extremely important within the first 72 hours after surgery. It is also important after any new injury.
How long?
Should last approximately 10-15 minutes
How?
Place a thin towel between the leg and a bag of frozen veggies
Why?
Decreases healing time, pain and inflammation
Length and Time?
Follow the week by week protocol
Dry Heat Therapy
A sock can be used to make the warmer for the dry heat. Add Rice or dried corn to a sock and microwave to heat up. This should be heated in 30 second increments to make sure the warmer does not get too hot to cause discomfort.
**Try the warmer on yourself before applying to your pet**
This can be done 3 – 6 times per day for a totally of 5 – 10 minutes
Massage
The healing power of touch can help to relax the muscles and release endorphins to help decrease pain. A certified massage therapist is ideal, however many techniques can be done by owners
Why?
- Can be beneficial in the human and animal bond
- Decreases pain by stimulating endorphins
- Improves circulation
- Decreases edema
- Helps maintain muscle tone
How?
Run your hands over your pet, applying medium pressure. Start at the neck, moving down to the tail and down each leg for a total of 4 times. Always do this at the beginning of each session. Once your pet is relaxed, you can begin to massage. Start at the toes and work your way up the legs.
Stretching
It is important to note that stretching is different from the PROM exercises, because stretching involves gentle forcing of the tissue beyond its normal ROM.
Why?
- Increases flexibility of joints
- Increases the extension of the muscle, tendons and surrounding joint tissue
- Conteracts contracture forces
How?
- Best to perform proper stretching while your pet is lying on its side
- Support the leg above and below the knee
- Gently manipulate the knee to the comfortable end of its normal ROM in flexion. Then apply just a touch more pressure and HOLD this position for 15 seconds
- Then allow the limb to return to a neutral position for 15 seconds
- Then repeat for a total of 10 times
- This should be done for both flexion and extension
Passive Range of Motion (PROM)
If a joint stays in one position too long, the limb will lose flexibility and cause stiffness.
Any increased stiffness can lead to a slower return to activities, such as walking.
PROM is the process of moving the joint with your hands without muscle contractions.
To better understand the concept, place your left hand around your right wrist. Now without contracting any muscles in your right arm, use your left arm to guide your right elbow through its available ROM. This type of therapy is extremely important in flexibility.
Why?
- Improves joint motion after surgery
- Prevents joint contracture
- Prevents soft tissue inflexibility and shortening
- Prevents adhesions between soft tissue and bone
- Increases joint lubrication
- Decreases pain
How?
PROM can be done with your pet standing. However, it is typically more relaxing and beneficial to have your dog lying on its side. It is crucial that you are gentle and do not cause any discomfort.
- Support the limb above and below the knee joint.
- Move the limb below the joint in a smooth and controlled way, while keeping above the joint steady.
- Gently move back and forth throughout the joint’s full range of motion.
- Try to perform 10- 15 repetitions if they will allow you to.
Bicycle ROM: alternative to the ROM above
- Think of how your leg moves on a bicycle. All of your joints benefit from this fluid movement. While your dog is lying comfortably and relaxed on its side, hold the foot to recreate this “bicycling” technique.
Strengthening Exercises
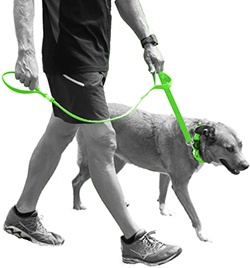
Slow Controlled Leash Walks
- The most important exercise to be performed during the early recovery period
- Must be kept on a SHORT lead close to your body
- By walking slowly you will encourage your dog to use the affected limb
- Walking short distances is beneficial to keeping the muscles strong and the joints lubricated
- Can have a positive emotional reward for your pet also
- Increases strength, decreases pain and atrophy along with encouraging them to use the affected limb
Sit to Stand (Sit ups)
- This helps to improve the overall range of motion of the hip, knee and hock
- Proper form is required for this to work
- Sitting – Must sit “square” with both legs flexed and equally positioned under the dog’s body
- Standing – From the sitting position the legs need to give a proper and equal push from both hind legs
- Make this fun – by giving treats and taking a step back after they sit so that they can come toward you
- If needed, the pet can sit next to a wall with the affected limb against the wall to help get the correct position
Figure 8 Exercise
10 repetitions 1 to 2 times daily
- Walk your dog along an imaginary drawing of a figure 8 on the ground. If there is any imbalance, make the figure 8 bigger. The goal of this is to increase muscle strength and balance.
Curb Work
10 – 20 feet 3-4 times per day on walks
- Curb work is basically stepping up and off a length of curb while on your walk with your dog. The curb should be appropriate for you dog’s height. A small dog should step off a curb that is about 2 inches high. Medium dogs should use a 3 inch high curb. Large dogs should use a 3 – 5 inch high curb. Any surface can be used but should be about 15 – 20 feet in length.
- Make an “S” shape pattern as you walk on and off the curb.
- This exercise will help to increase muscle strength, girth, and balance as well as improve the flexion and extension.
- Stop if there is any difficulty.
Slow Controlled Hill Walks
- When walking up a hill, the majority of the weight will be shifted to the rear legs. This will increase weight bearing on the affected leg significantly.
- Walking uphill causes extension and downhill will cause flexion.
- Walking perpendicular across the hill with the affected leg on the downward side of the hill will force the patient to put a greater amount of weight on the affected leg
- Keep the leash short and walk slowly.
- The slower you walk, the more likely the dog will place the leg down.
Stairs
- Stairs can be extremely beneficial if done at the proper time in rehabilitation.
- They should only be done after your dog is constantly and confidently using the limb during walking.
- Climbing stairs utilizes all the major hind muscle groups.
- This will improve flexibility and overall ROM.
- You must have full control over your dog.
- Utilize the short leash technique.
- Never allow stair access without supervision.
